TiPi
What is TiPi
TiPi is an order system for vehicle transport companies which is designed to ease the management of information by organizing clients and their orders in one place in a easy to read form.
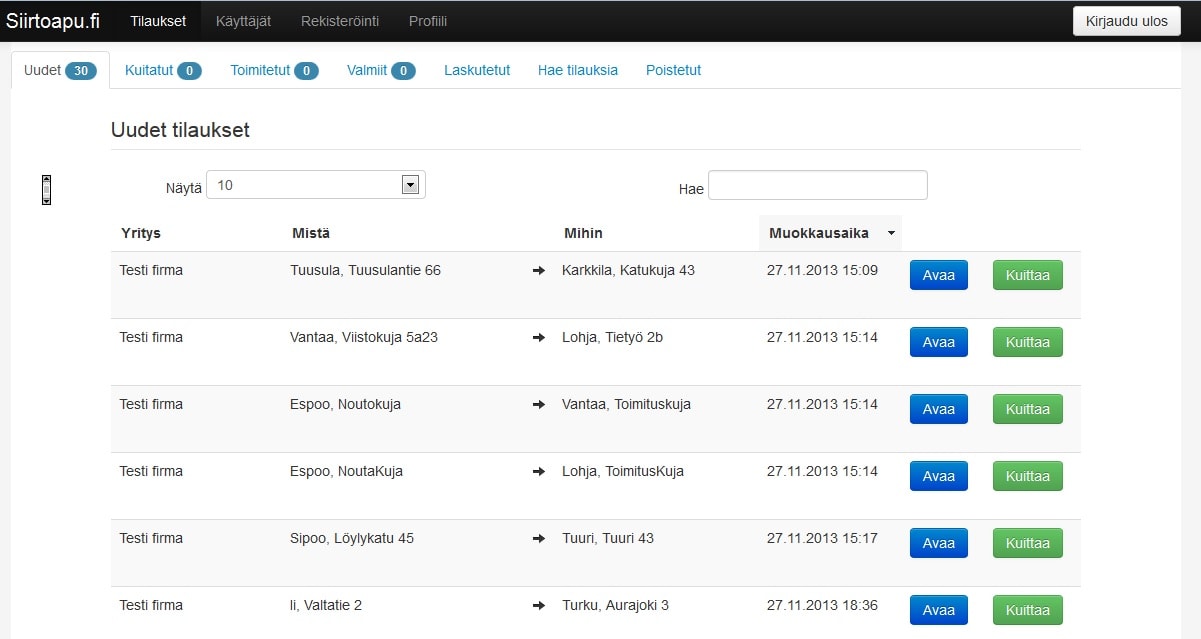
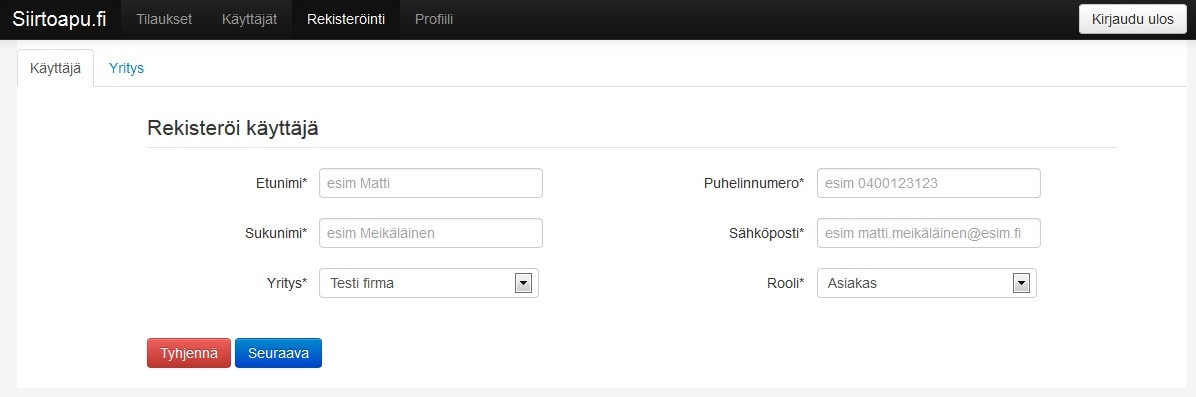
From the admin-side, company employees can add new client companies and users, manage their orders and inform the progress of said orders by moving the order through a set of stages.
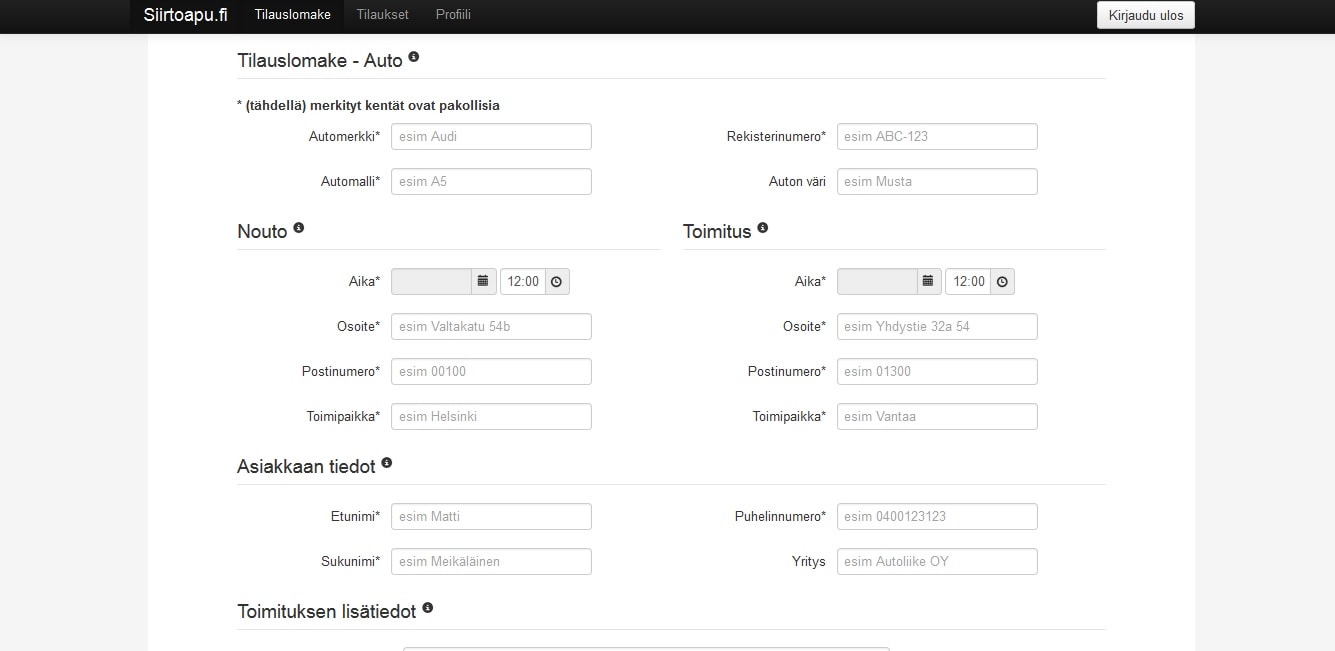
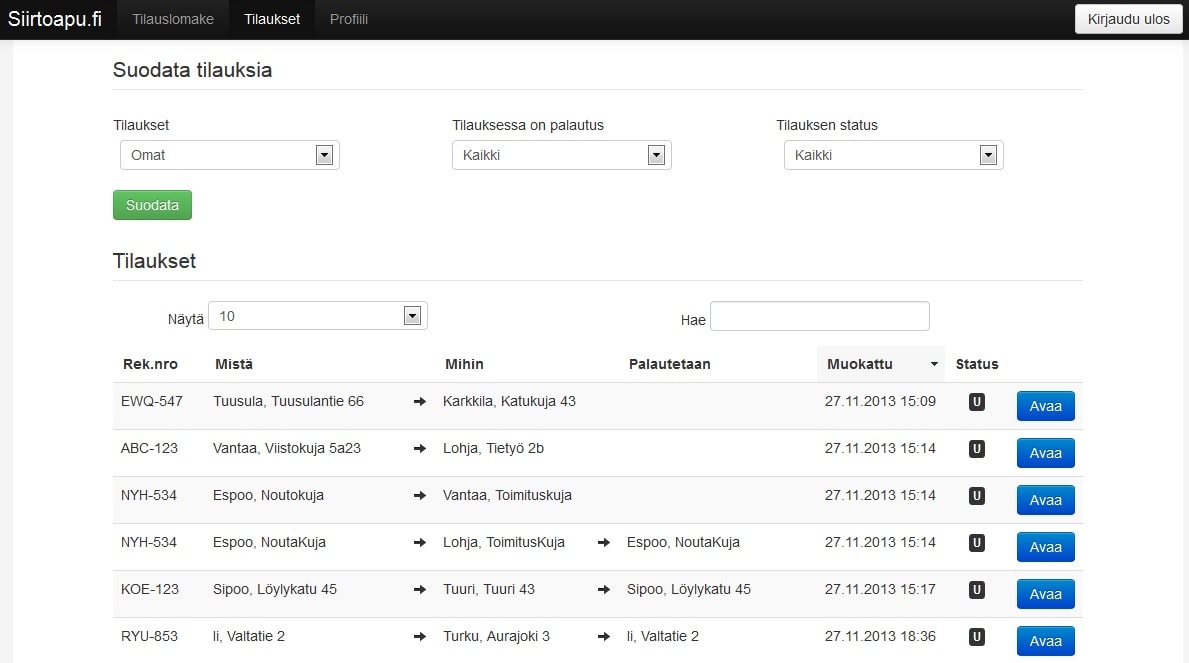
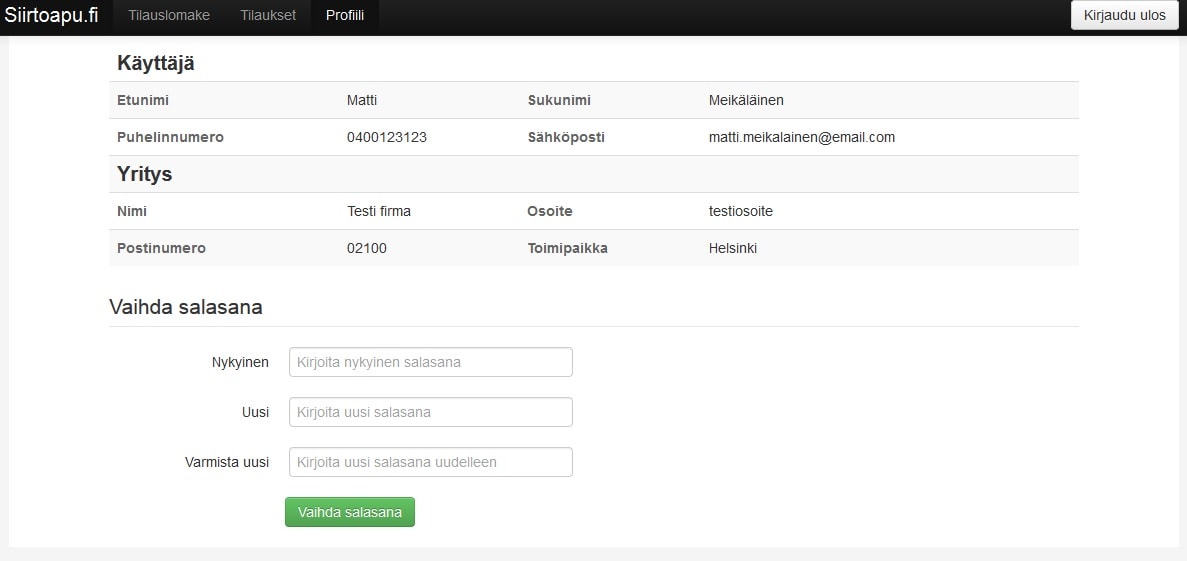
From the user-side, clients can check and change their profile, make new orders and check or modify the information of earlier made orders.
Source code for TiPi can be found in GitHub.
TiPi has been tested by siirtoapu.fi
Siirtoapu.fi’s manager Pekka Lindholm praised the system as very simple and easy to use.
Mikä on TiPi
TiPi on tilausjärjestelmä autonkuljetusyrityksille, jonka tarkoitus on helpottaa tiedon hallintaa organisoimalla sekä asiakkaat että tehdyt tilaukset yhteen paikkaan, helppolukuiseen muotoon.
Hallintapuolelta yrityksen työntekijät voivat lisätä asiakasyrityksiä ja niille käyttäjiä, hallita asiakkaiden tilauksia ja ilmoittaa niiden etenemisestä siirtämällä tilauksia eri vaiheisiin.
Asiakaspuolelta käyttäjä voi tarkastella omaa profiiliaan, tehdä uusia tilauksia ja seurata tai muokata jo tehtyjen tilauksien tietoja.
Voit seurata projektin etenemistä GitHubista.
TiPiä testikäytettiin Siirtoapu.fi:n toimesta.
Siirtoapu.fi:n toimitusjohtaja Pekka Lindholm:
“Todella toimiva ja helppokäyttöinen.”
Screenshots/Kuvakaappaukset
Authors/Tekijät
Lauri Soivi, Samuel Kontiomaa & Joona Viertola
How to install TiPi
I use Ubuntu 14.04 LTS. If you want to make WAR-file from the source codes, you can find guide to that after this installation guide:
How to deploy WAR-file
Create database
Install MySQL and login with root.
$ sudo apt-get update
$ sudo apt-get install mysql-server
$ mysql -u root -p
Create database tipi and user tipiuser
CREATE DATABASE tipi;
GRANT ALL ON tipi.* TO tipiuser@localhost IDENTIFIED BY "P4dDv0kD!In34dPLs54?";
Add test data
Install git and clone project
$ sudo apt-get install git
$ git clone https://github.com/Soivi/TiPi.git
Create tables and insert test data and users
$ cd TiPi/database
$ mysql -u root -p tipi < create.sql
$ mysql -u root -p tipi < insert.sql
Install Tomcat and start TiPi
Install Tomcat and test it starts correctly
$ sudo apt-get install tomcat7
$ firefox localhost:8080
Get TiPis WAR-file if you haven’t deployed it by yourself with guide after this.
$ wget https://download.soivi.net/TiPi.tar.xz
$ tar -vxf TiPi.tar.xz
$ sudo mv TiPi.war /var/lib/tomcat7/webapps/
Test TiPi
Start browser
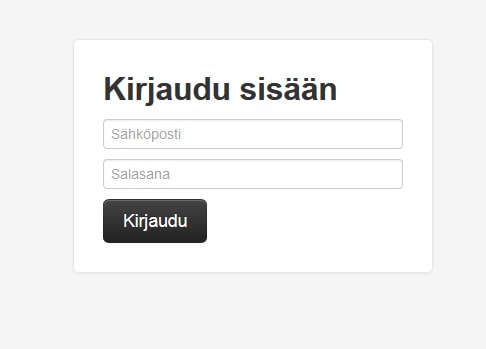
$ firefox localhost:8080/TiPiHere are users Password to signing in
Test User
email: matti.meikalainen@email.com
password: nakki

Test Admin
email: timo.tomera@email.com
password: nakki
How to deploy WAR-file
If you want to make changes or develope TiPi-project here is how you can add TiPi to Eclipse and export WAR-file
Install git and get Tipi
Install git and clone TiPi-project
$ sudo apt-get update
$ sudo apt-get install git
$ git clone https://github.com/Soivi/TiPi.git
Create configuration to database and logging
$ cd TiPi
$ mkdir conf
$ cd conf
$ nano db_connection.properties
Add these configurations to your database configuration file
db.driver=com.mysql.jdbc.Driver
db.url=jdbc:mysql://localhost/tipi
db.username=tipiuser
db.password=P4dDv0kD!In34dPLs54?
And configure log4j
$ nano log4j.propertiesAdd these lines to your logging configuration file
# Set root logger level to DEBUG and its only appender to A1.
log4j.rootLogger=error, A1

# A1 is set to be a ConsoleAppender.
log4j.appender.A1=org.apache.log4j.ConsoleAppender

# A1 uses PatternLayout.
log4j.appender.A1.layout=org.apache.log4j.PatternLayout
log4j.appender.A1.layout.ConversionPattern=%-4r [%t] %-5p %c %x - %m%n
Install Tomcat and get servlet-api.jar
You can install Tomcat with apt or with Eclipse. I install it with apt.
$ sudo apt-get install tomcat7To build TiPi you need servlet-api.jar
$ cp /usr/share/tomcat7/lib/servlet-api.jar ~/TiPi/WebContent/WEB-INF/lib/Install Eclipse
Install Eclipse IDE for Java EE Developers 64 bit:
https://www.eclipse.org/downloads/
Unpack downloaded Eclipse tar
$ tar -xvzf eclipse-jee-mars-2-linux-gtk-x86_64.tar.gzCreate Dynamic Web Project
Open Eclipse and add workspace where you want it to be. I added it to my home folder.
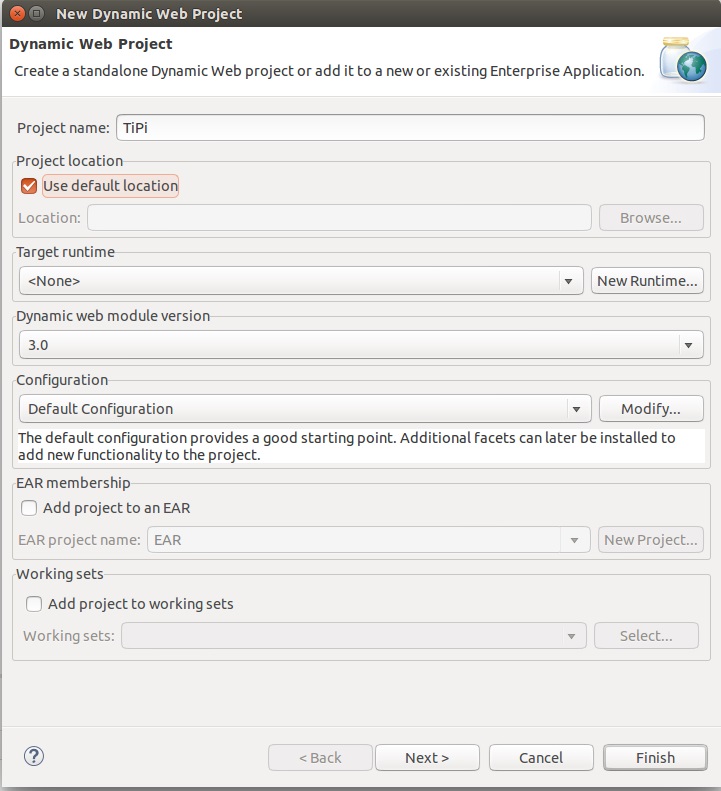
Create new Dynamic Web Project with name TiPi.
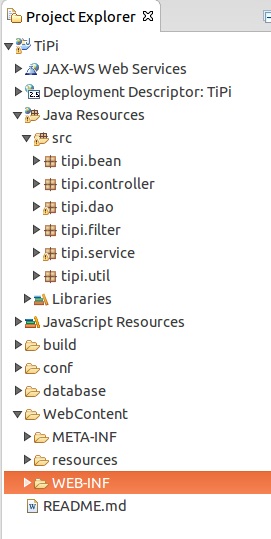
Copy your cloned TiPi project in your new created TiPi folder.
$ cp -r ~/TiPi/* ~/workspace/TiPi/Refresh your project in Eclipse.
Configure TiPi project and export WAR-file
Add this line to your .classpath file. This way applicationContext.xml can find database configurations
<classpathentry kind="src" path="conf"/>Configure .classpath
$ nano ~/workspace/TiPi/.classpathFile should look something like this
<?xml version="1.0" encoding="UTF-8"?>
<classpath>
        <classpathentry kind="src" path="src"/>
        <classpathentry kind="src" path="conf"/>
        <classpathentry kind="con" path="org.eclipse.jdt.launching.JRE_CONTAINER/org.eclipse.jdt.internal.debug.ui.launcher.StandardVMType/JavaSE-1.7">
                <attributes>
                        <attribute name="owner.project.facets" value="java"/>
                </attributes>
        </classpathentry>
        <classpathentry kind="con" path="org.eclipse.jst.j2ee.internal.web.container"/>
        <classpathentry kind="con" path="org.eclipse.jst.j2ee.internal.module.container"/>
        <classpathentry kind="output" path="build/classes"/>
</classpath>
Refresh your project in Eclipse. You should find in TiPis properties conf folder as a new source path.
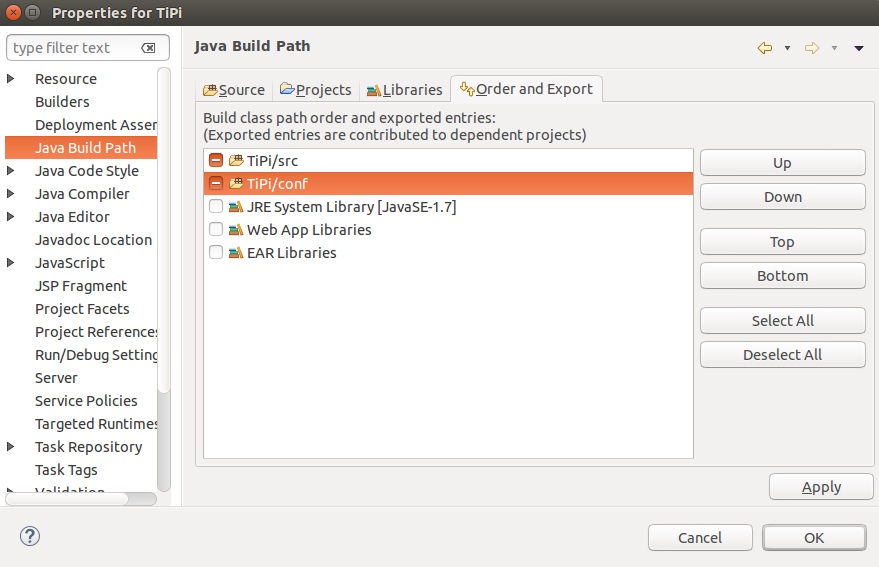
Export WAR-file.
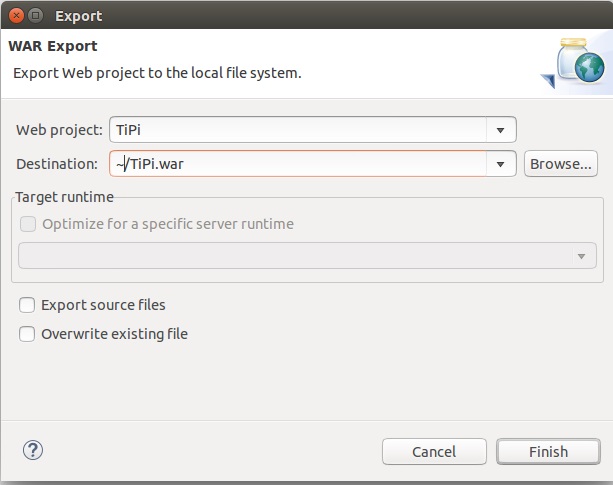
If you installed Tomcat you can now try run your TiPi project.
$ sudo mv ~/TiPi.war /var/lib/tomcat7/webapps/
$ firefox localhost:8080/TiPi
You can’t sign in because you don’t have database. Now you need to follow guide what is before this guide:
How to install TiPi
If you need to remove Tipi from Tomcat here is the command.
$ sudo rm /var/lib/tomcat7/webapps/TiPi.war2016-03-30 EDIT: Added “How to install TiPi” and “How to deploy WAR-file”